After every heavy rainfall and winter thaw, I get pooling water in my backyard. This water makes its way into my basement, causing multiple issues. Since my backyard is on a slight grade, my neighbor’s runoff drains into my yard and worsens the pooling.
To solve this, I’m putting in a rain garden setup and showing you how to do it without power tools or heavy machinery.
What is a Rain Garden?
A rain garden is a special type of garden built to retain large amounts of runoff and rainwater. It involves digging about 1.5 feet deep, adding coarse sand, triple mix soil, and long-rooted native plants.
These elements work together to improve a yard’s ability to hold water, prevent basement flooding, and protect the foundation. Rain gardens also help ecosystems by supporting pollinators and filtering stormwater runoff.
Tools and Materials Needed
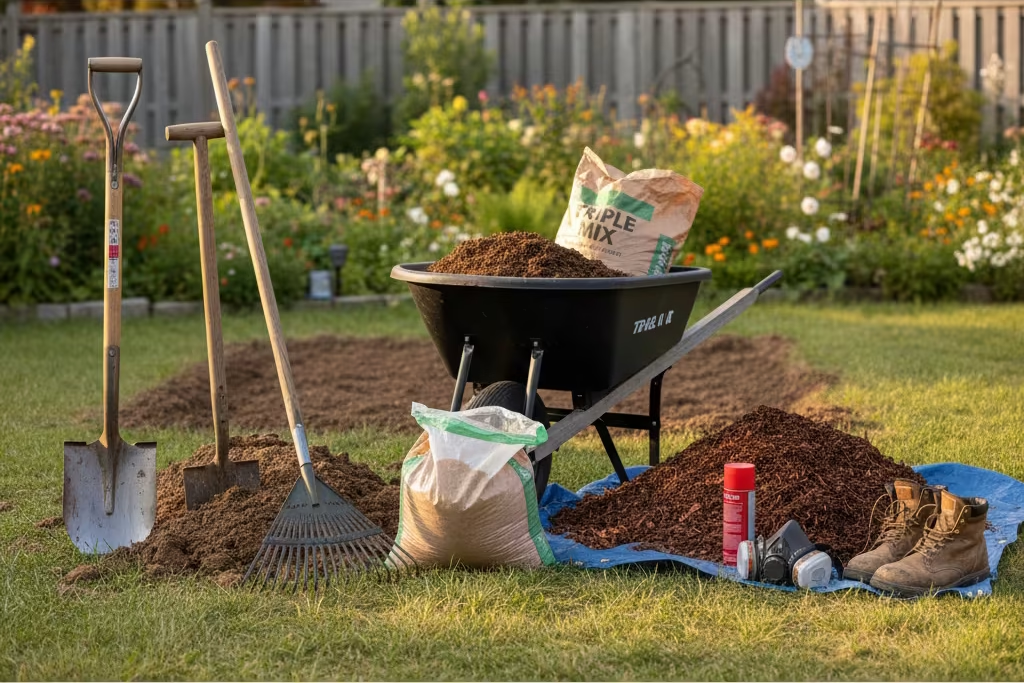
- Long-handled round point shovel
- Five-pound garden pick (Matic)
- Bow rake
- Wheelbarrow
- Ground-marking spray paint with respirator
- Triple mix soil (loam, compost, topsoil)
- Coarse sand
- Shredded hardwood mulch
- Work boots
Step 1: Plan Your Rain Garden
Draw the shape of your desired rain garden and choose suitable plants.
Common shapes: circular or kidney.
Use native plants that thrive in wet conditions, and place the garden at least 10 feet from your foundation.
Step 2: Call Utilities Before Digging
Contact your local call before you dig hotline to mark underground utilities.
If adding a rain garden in a private backyard, also hire a private locate service to avoid hitting hidden lines.
Step 3: Mark the Digging Area
Use spray paint to outline your dig area. This provides a clear guide and prevents overdigging.
Step 4: Sharpen Your Shovels
A sharp shovel makes cutting through soil faster and easier. Use a motor sharpener or wheel sharpener, and wear eye protection.
Step 5: Start Digging
Break compacted clay soil with a Matic, dig at least 1.5 feet deep, and avoid hard vertical edges. Shape the hole like a bowl to encourage water movement towards the center.
Step 6: Fill with Sand
Add coarse construction sand to the bottom one-third of the pit. Avoid fine sand, as it hardens like concrete. Tamp and compact the sand to reduce settling.
Step 7: Add Triple Mix Soil
Fill the second one-third of the pit with triple mix soil. Blend gently with the sand layer beneath, then tamp lightly. Keep space for mulch.
Step 8: Plant Native Species
Select plants with long roots suited for wet conditions. Perennials are a low-maintenance option. Water immediately and use transplant solutions to help them establish.
Step 9: Mulch Your Garden
Add a thin layer of shredded hardwood mulch. This protects soil, retains moisture, and suppresses weeds.
Benefits of a Rain Garden Setup
- Prevents basement water intrusion
- Beautifies your yard
- Supports pollinators and wildlife
- Improves soil drainage
Additional Tips
- Best time: Spring or early autumn.
- Rent a clean fill bin to dispose of old soil.
- Stretch, eat well, and rest before digging.
- Water plants regularly; full maturity takes about two years.
Costs of Rain Garden Setup
Total: $1,966
This includes plants, coarse sand, triple mix, bin rental, utility locate services, tools, and mulch—far less than professional landscaping quotes.